After a few false starts over the years, I’ve decided to commit to blogging semi-regularly about some awesome technologies and my no doubt less awesome thoughts around them.
I know engineers who will agonise for days over the tools and technologies that they’ll use for a personal project, and there’s nothing at all wrong with that. But I’m not one of them. They’re probably better engineers in the long run, but I’m quite lazy, so when I was looking to set up this blog I knew that I didn’t want to spend too much time on the setup.
I knew that the best option available was probably going to be a cheap as chips serverless solution. That way AWS can worry about keeping everything up, and I can kick back and just (occasionally) write up some posts. So what did I decide on?
I’d almost settled on a solution using Github, CodeBuild, and S3 when I stumbled across AWS Amplify. I’d heard of the service, but thought it was just a rebranding and update for Mobile Hub. Turns out, it’s not.
Amplify is a one-stop shop for deploying mobile and web apps on a scalable, serverless backend. And I have to say it’s pretty awesome.
Deploying Hugo with AWS Amplify
The Amplify Framework provides comprehensive libraries, simple but powerful toolchains, and out of the box UI components that you can leverage, along with authentication and a whole host of other good things.
While I might venture into this in the future, my use case when building this site was really simple, since I’d already decided on using Hugo as a framework and just wanted a method for deploying and hosting it. The Amplify Console supports all Single Page App (SPA) frontend frameworks (e.g. React, Angular, Vue.js, Ionic, Ember), as well as static-site generators like Gatsby, Eleventy, Hugo, VuePress, and Jekyll.
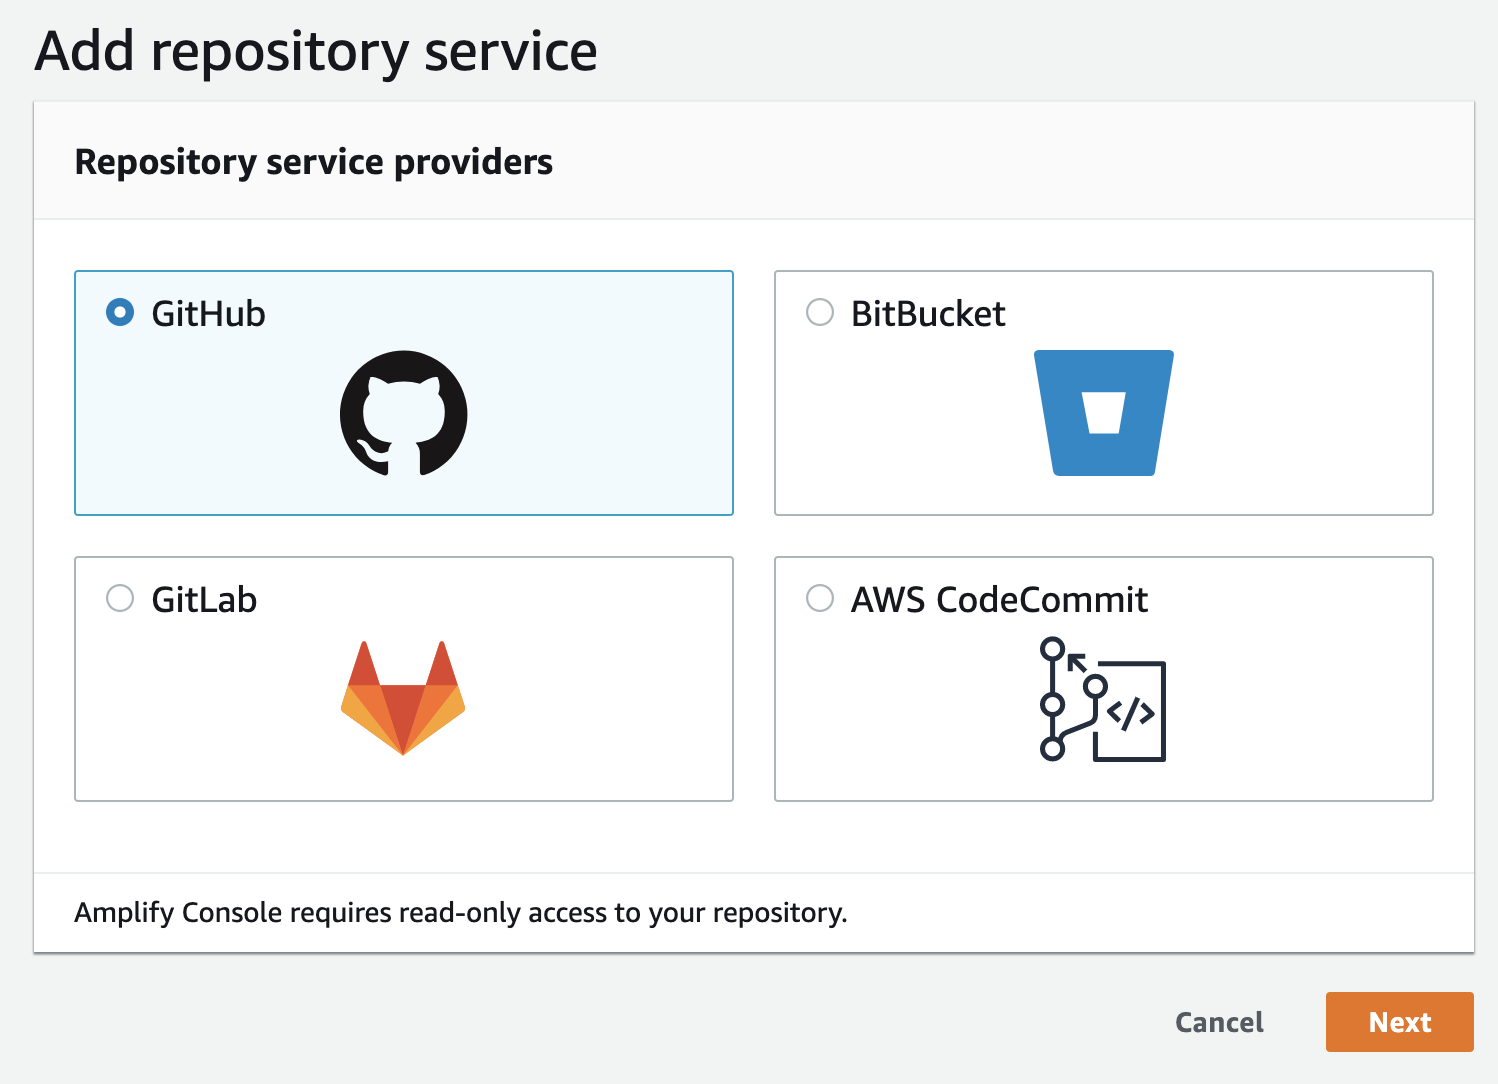
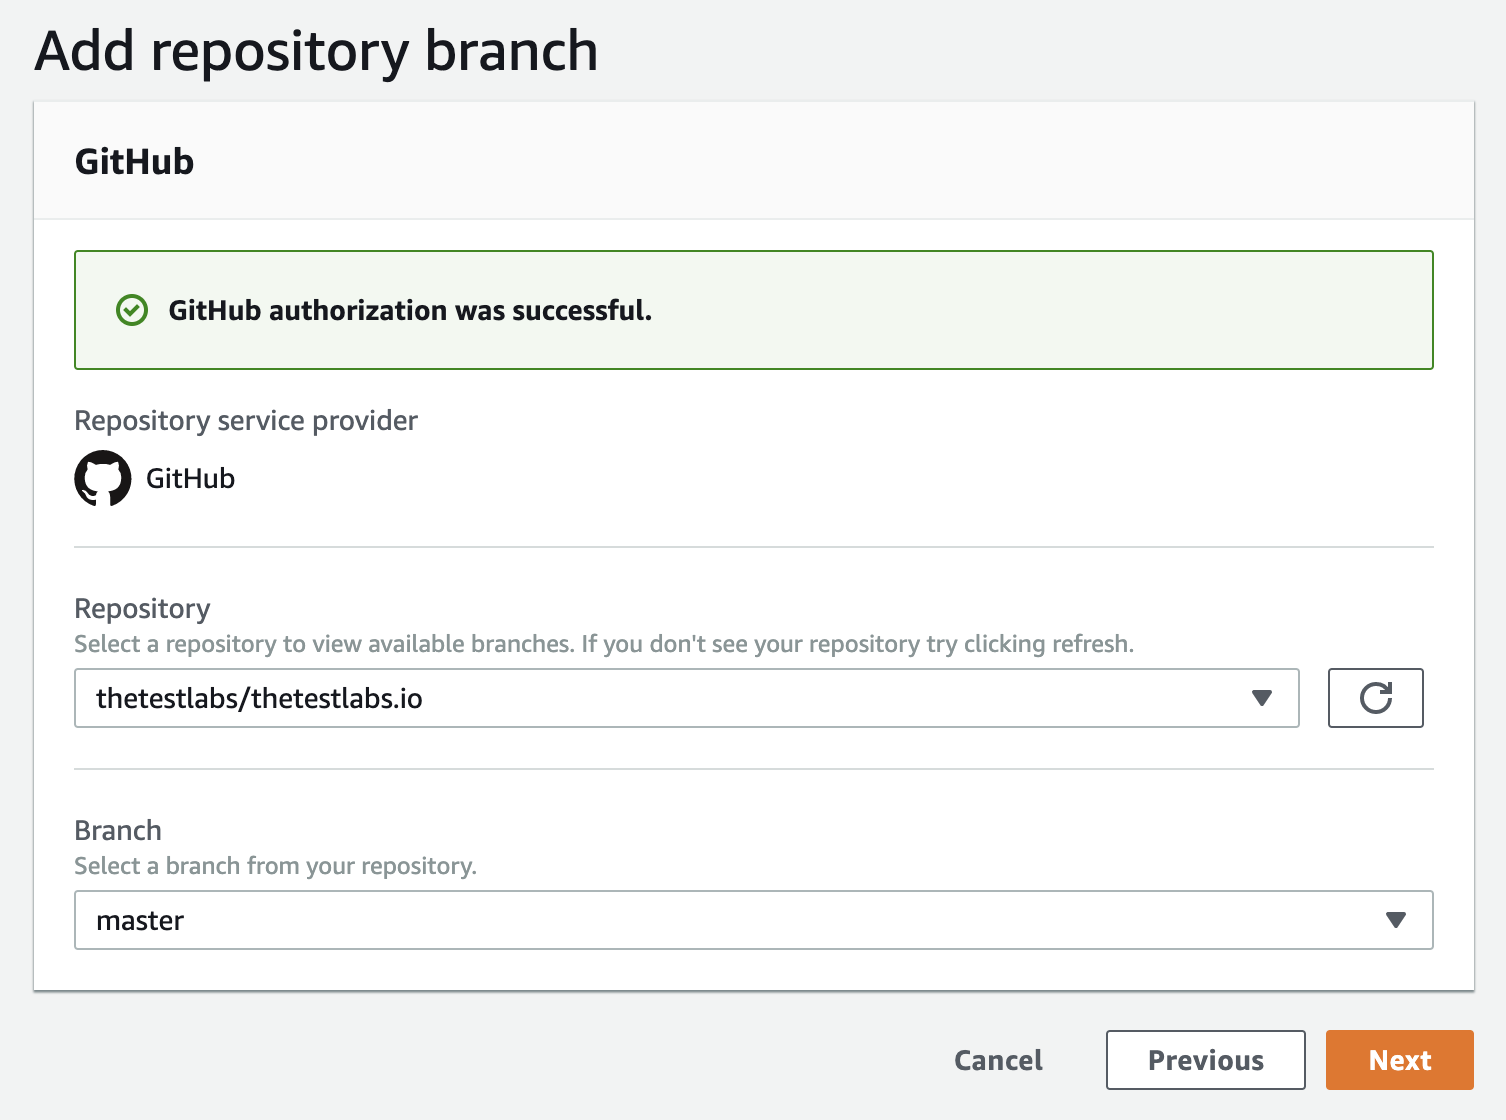
The first thing that you need to do is to connect your AWS account to your source code and authorise it. Select the branch that you want Amplify to monitor for changes, and you’re pretty much set.
Amplify then auto-detects Hugo’s build settings, and generates a build file, along with the options of adding Environment Variables. The build script we’re given is:
version: 0.1
frontend:
  phases:
    build:
      commands:
        - hugo
  artifacts:
    baseDirectory: public
    files:
      - '**/*'
  cache:
    paths: []
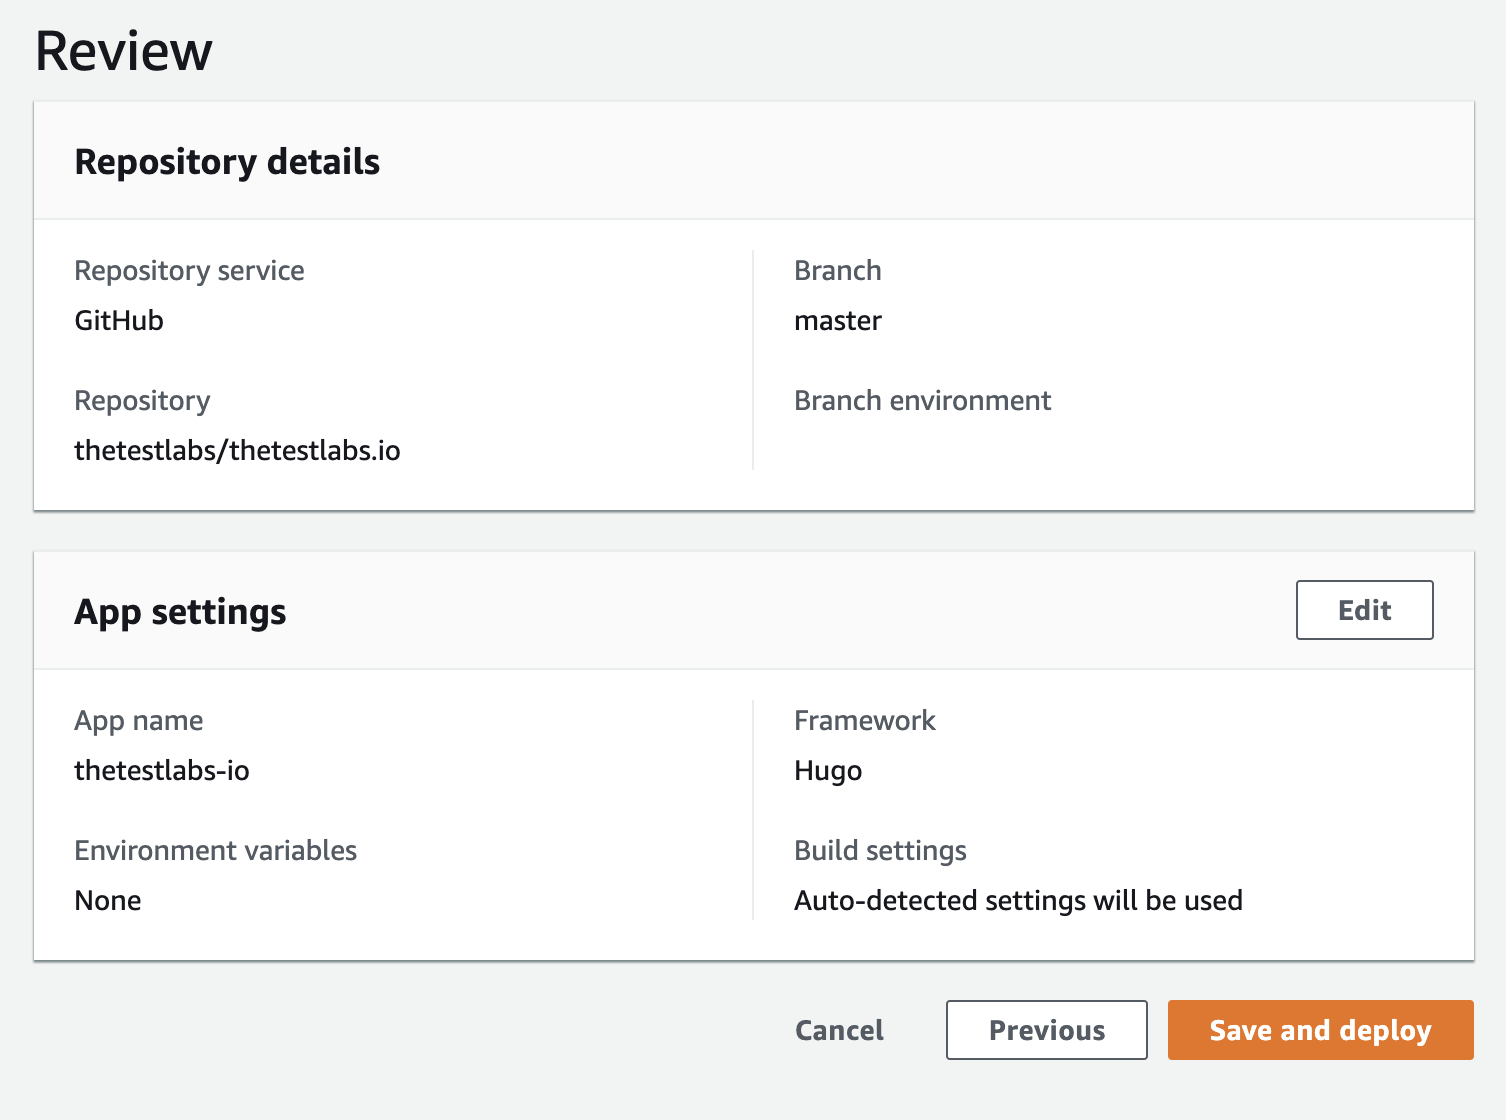
Looks ok initially, so on to the next stage without changing anything to the review and confirmation screen.
Amplify then builds the app from your repo, and provides a URL to the deployment. Unfortunately, it looks like it didn’t work!
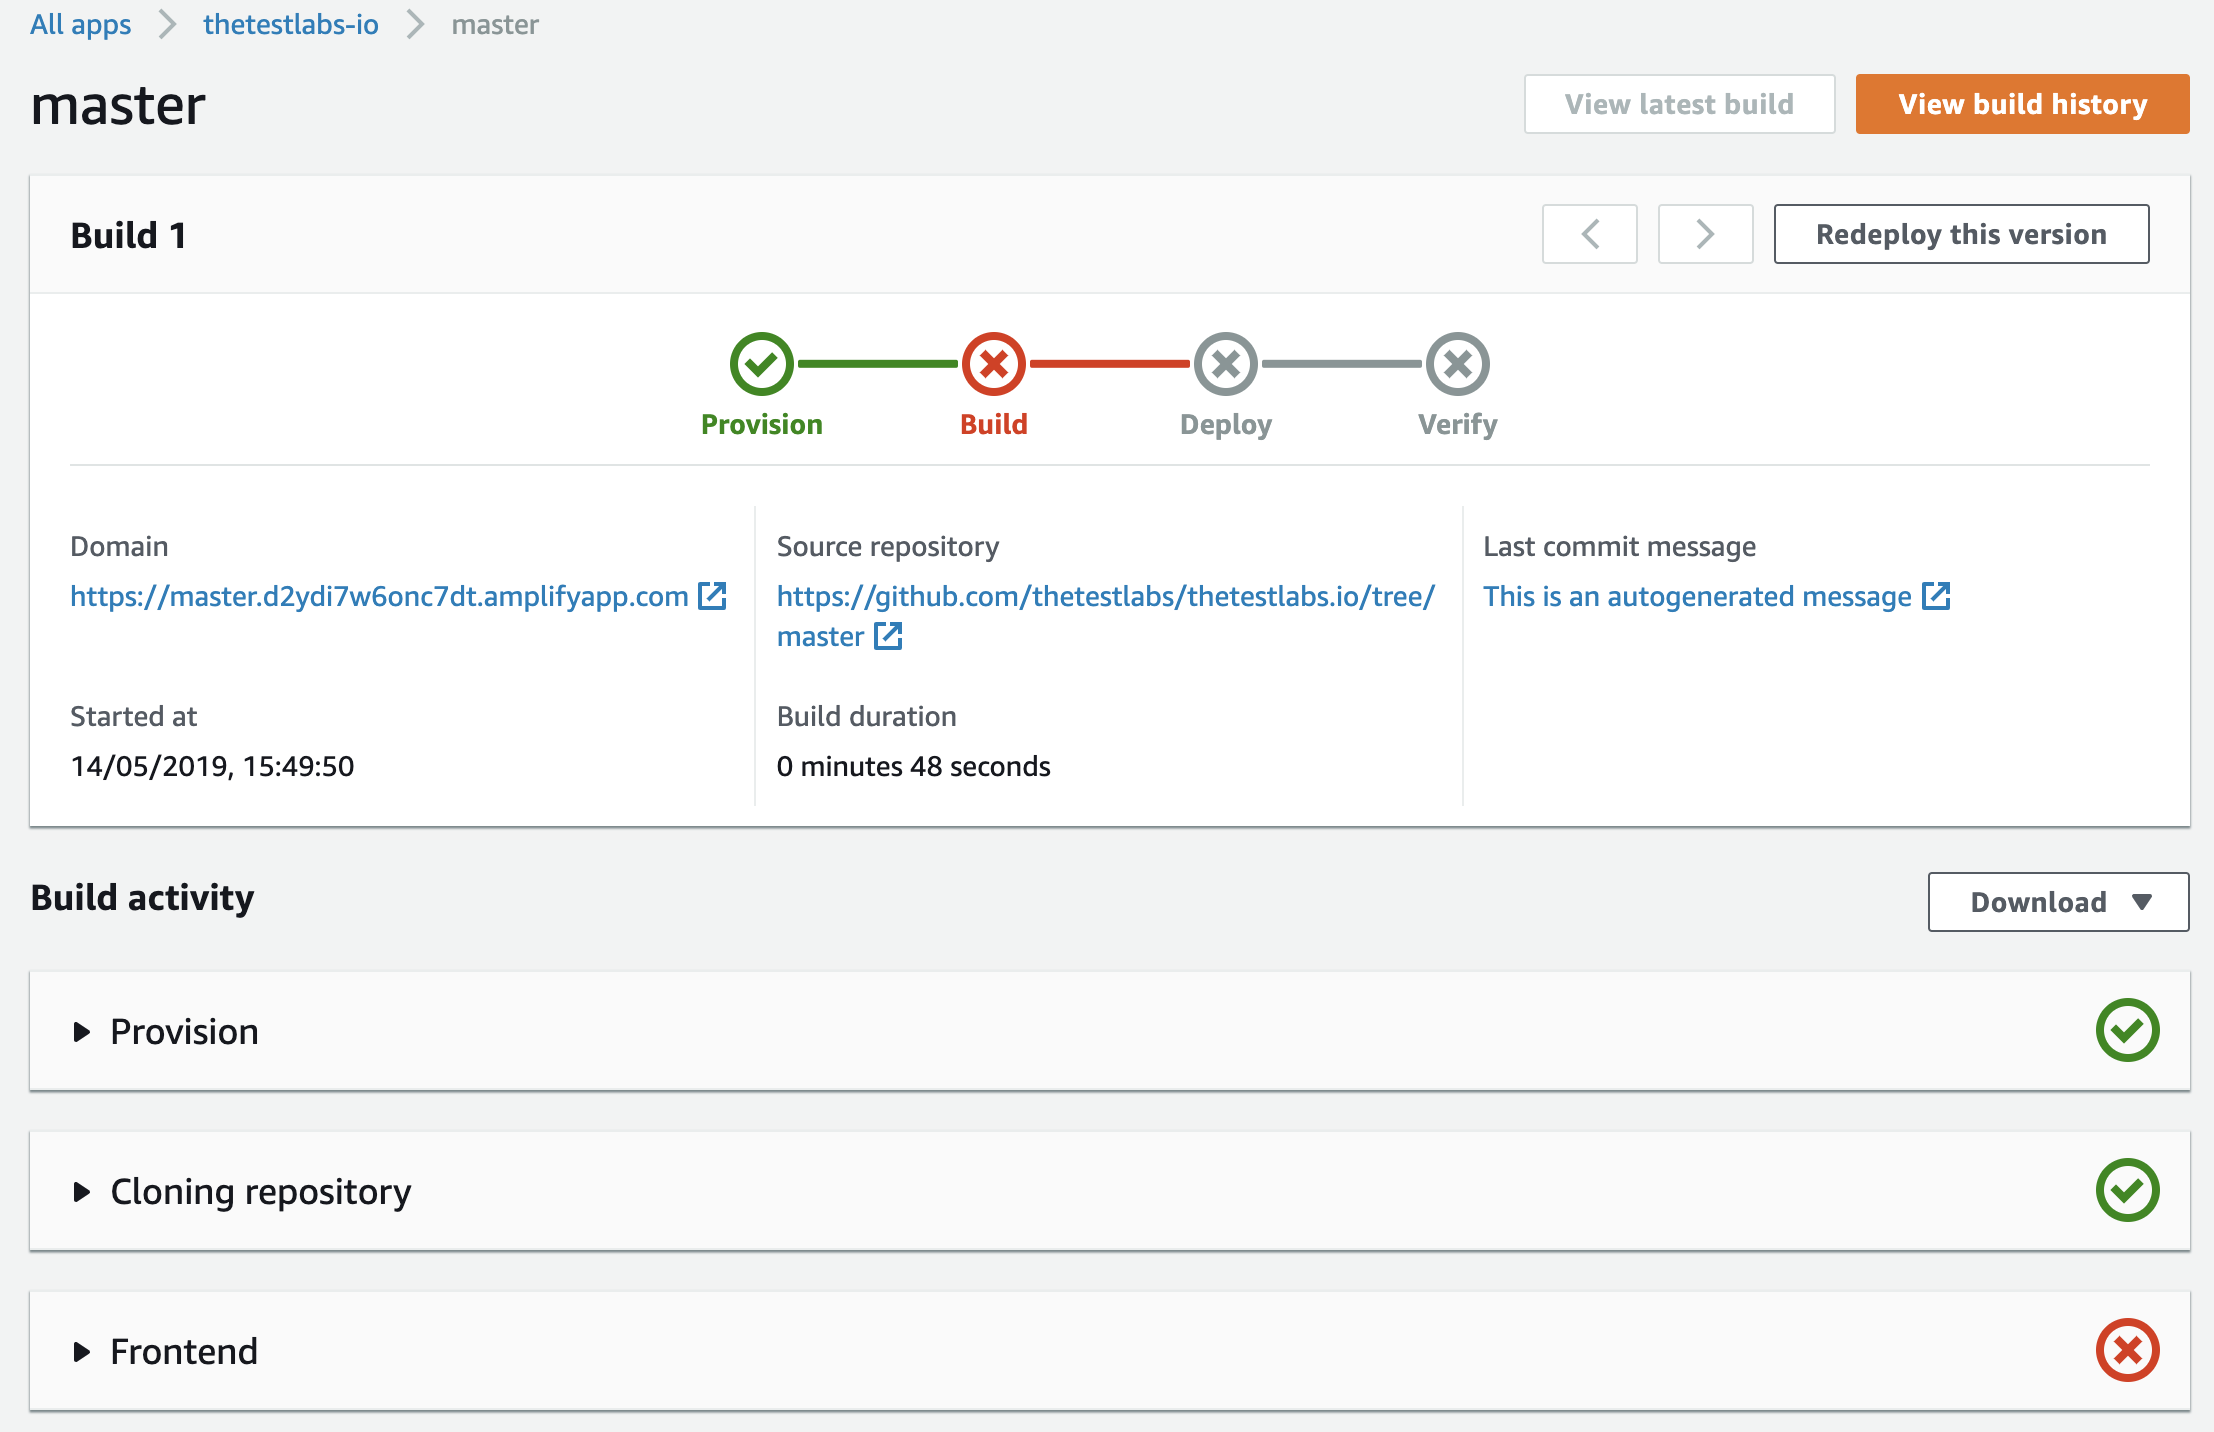
Clicking on the red build button lets you look at the output, but it doesn’t show anything too definitive, other than that running the command hugo failed. Taking a look at the Provisioning step throws some light on it though. The build environment is provisioned with a Docker image, and you can see the contents of the Docker file being used. In this case, it looks like the version of Hugo being deployed doesn’t meet the minimum requirements of the theme I’m using.
FROM amazonlinux:1
MAINTAINER Amazon AWS

# Framework Versions
ENV VERSION_NODE_8=8.12.0
ENV VERSION_NODE_6=6
ENV VERSION_NODE_10=10
ENV VERSION_NODE_DEFAULT=$VERSION_NODE_8
ENV VERSION_RUBY_2_3=2.3.6
ENV VERSION_RUBY_2_4=2.4.3
ENV VERSION_RUBY_DEFAULT=$VERSION_RUBY_2_3
ENV VERSION_HUGO=0.51
ENV VERSION_YARN=1.13.0
I head over to the build file that Amplify generated for me, and make the necessary changes there. I add a new Environmental Variable - VERSION_HUGO_NEW - with the required version, and then add the required install commands, removing the version that is installed by the Dockerfile for good measure. The final build spec file looks like this:
version: 0.1
frontend:
  phases:
    build:
      commands:
        - rm -rf /usr/bin/hugo
        - mkdir hugo
        - wget https://github.com/gohugoio/hugo/releases/download/v${VERSION_HUGO_NEW}/hugo_${VERSION_HUGO_NEW}_Linux-64bit.tar.gz
        - tar -xvf hugo_${VERSION_HUGO_NEW}_Linux-64bit.tar.gz -C ./hugo
        - mv ./hugo /usr/bin/hugo
        - rm -rf hugo_${VERSION_HUGO_NEW}_Linux-64bit.tar.gz
        - /usr/bin/hugo/hugo
  artifacts:
    baseDirectory: public
    files:
      - '**/*'
  cache:
    paths: []
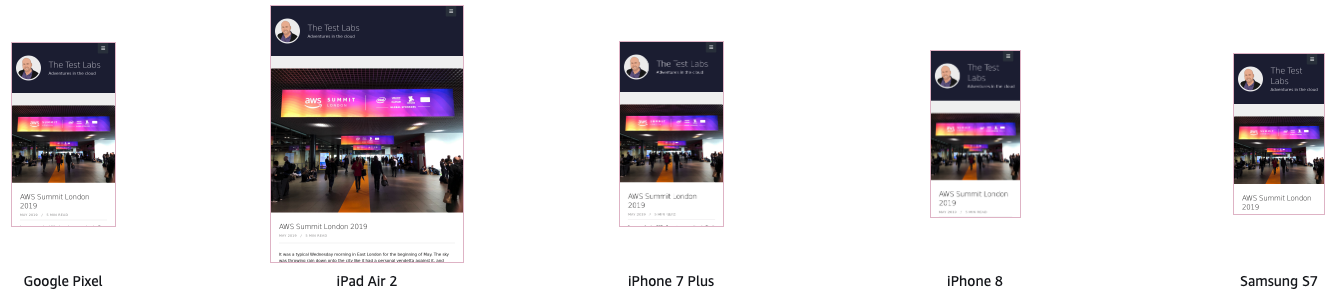
Running the build a second time by choosing the option to redeploy the version is successful, and the Verify stage also includes generated screenshots for various devices, which is a really nice touch.
Visiting the generated link for the app takes me straight to the deployed site, which all looks as expected. The next step is to configure a custom domain, so we head over to Domain Management and click on the ‘Add domain’ button. The search box will automatically list any domains that are managed in Route53, so we can choose the domain we want and go on to configure the details.

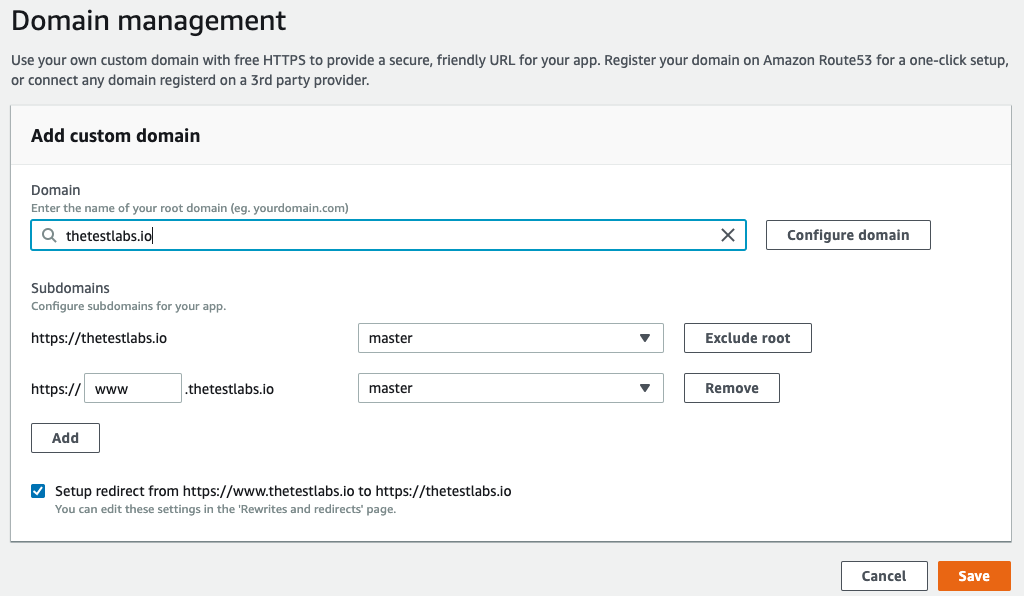
We’ll leave the tickbox selected to redirect requests to www to the naked domain, and save the configuration, at which point Amplify requests a certificate from on your behalf. For domains hosted outside of Route53 you’ll need to verify that you own the domain, and the process can take up to 48 hours. Since our domain is hosted in Route53, however, it doesn’t take too long to deploy.
Strangely, heading to thetestlabs.io doesn’t work, but www.thetestlabs.io does - and doesn’t redirect to the naked domain. Odd, so I head on over to Rewrites and redirects and the Source and Target addresses are the wrong way around. Quite honestly I don’t know if this is an issue with the wording in the Amplify setup or if I misconfigured a step, but it’s simple enough to just change them around, so I do that.
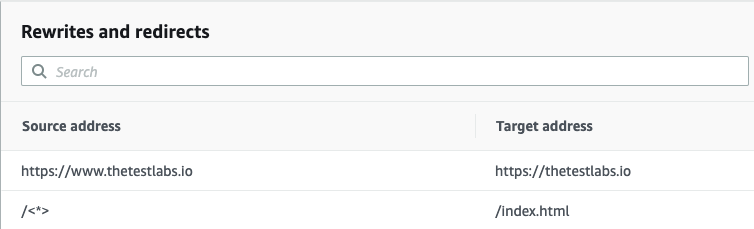
Everything now works as expected, with https://www.thetestlabs.io redirecting to https://thetestlabs.io.All I need to do to add content is just write a post locally and then commit and push the changes - the backend infrastructure and CDN configuration is all handled for me.