Budgeting and cloud costs are usually pretty far down the list when you’re engineering, however when your bill unexpectedly goes up they very quickly get to the top of the list in your next meeting!
In an agile world where environments can be updated multiple times during a day, it can be difficult to keep track of what’s changing in terms of costs, especially when implementing services that you haven’t had much prior experience with.
Infracost helps solve this issue by allowing you to compare current and projected cloud costs based on your code. As an added bonus, you can also drop Infracost into your CI/CD pipeline to make sure that everyone has visibility of the cost changes without leaving existing and familiar workflows.
In this post, we’ll look at projecting AWS costs before we deploy our code, and also walk through a method of comparing what you are working on locally with existing costs. Finally, we’ll look at adding this functionality into your deployment pipeline with GitHub Actions.
Installation and Pre-requisites
In order to run this example, you will need:
# A GitHub account

# An AWS account with credentials configured

# Terraform installed and on your $PATH

# A basic understanding of AWS resources in Terraform
You will also need to install Infracost, which is a simple process. These instructions are for macOS, and you can find install instructions for other platforms here:
brew install infracost
You will also need to register for an api key (this is free). This is used to query Infracost’s Cloud Pricing API:
infracost register
If you need to retrieve your key at a later date, you can always run the command infracost configure get api_key.
Get the Code
In order to follow the examples here, you can use your own code or make use of the example code. To get the example code, fork the repository from here.
We can now use Infracost to parse the existing code and give a price estimate of what we’re currently running:
cd infracost-code-example
infracost breakdown --path .
This will show the following output:
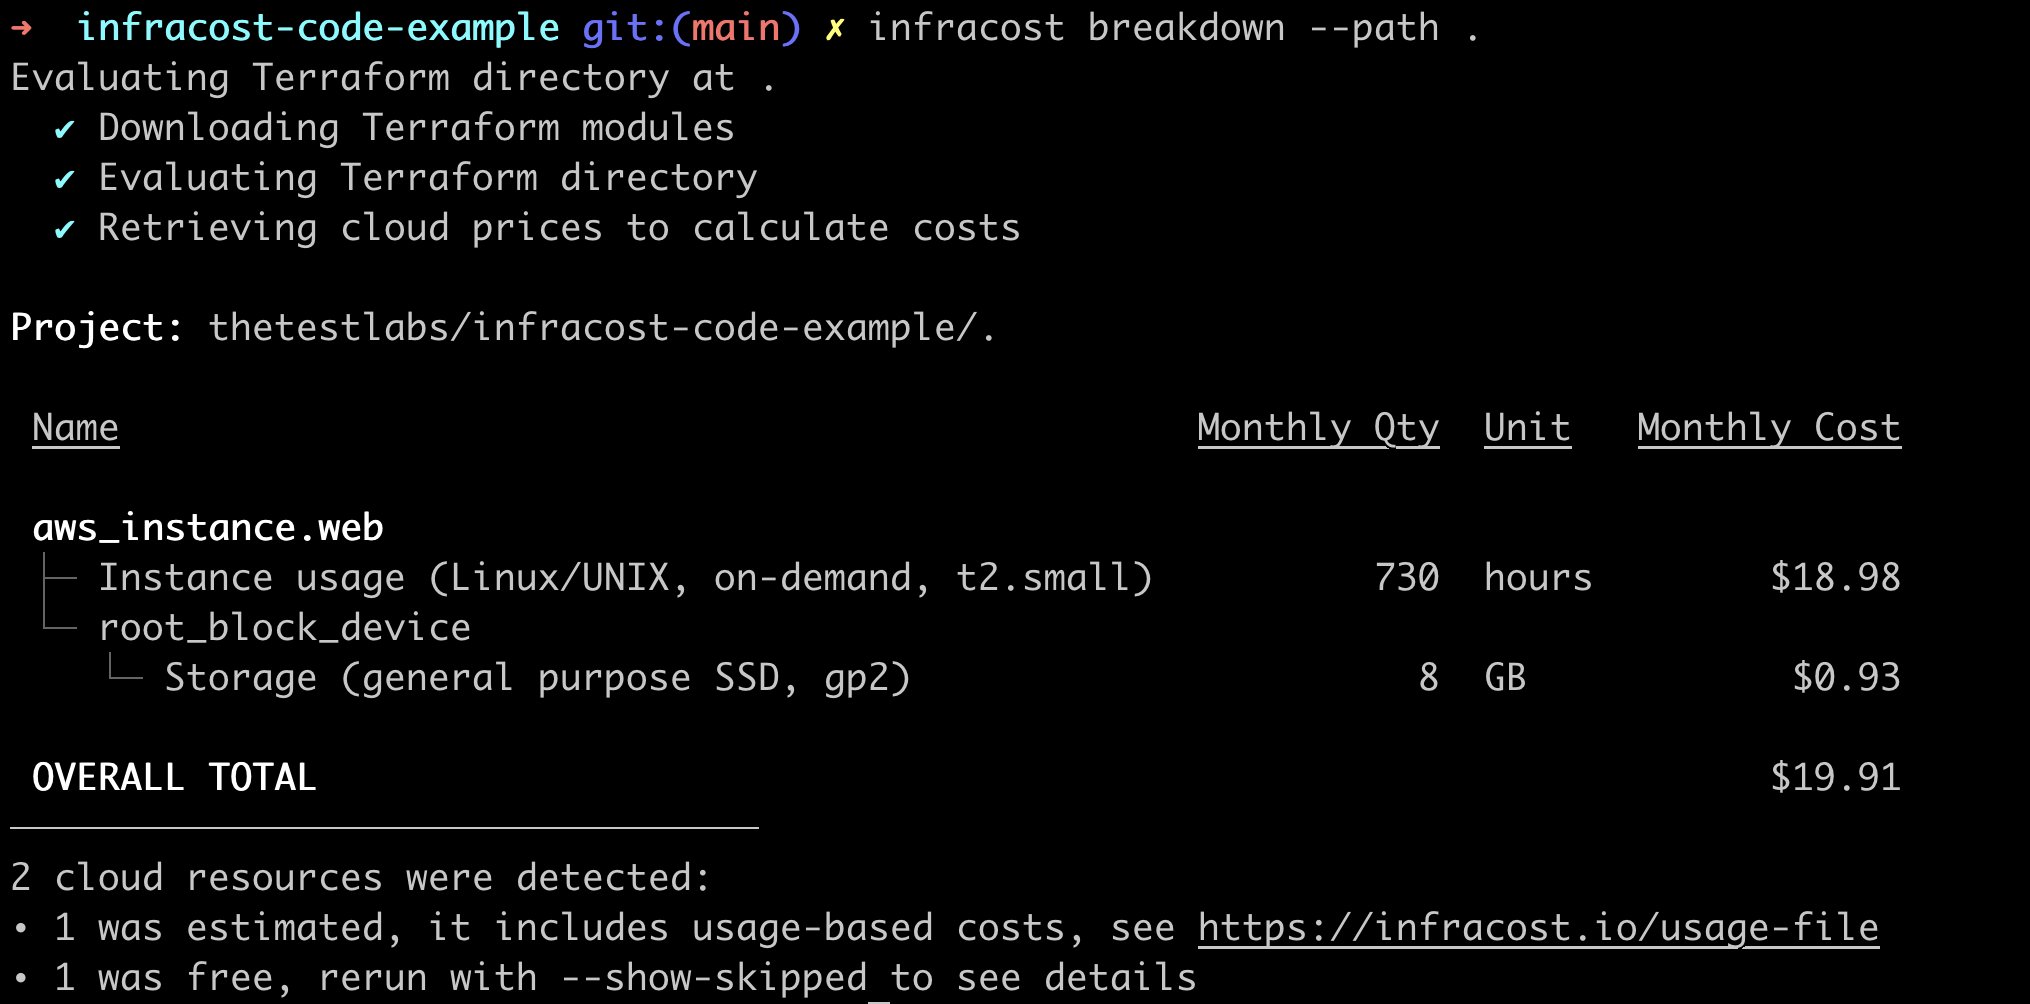
Presuming that this code is already deployed into our AWS account, this shows us the current running costs of the services that we already have running.
Now, let’s presume that we need to make changes to what we have deployed, and we’re going to be working on those changes locally. This is where Infracost’s diff command comes into play.
In our example, let’s say that the instance type needs to be changed in order to cater for increased demand. Before we make any changes, we need to create a baseline of what is currently running by using the following command:
infracost breakdown --path . --format json --out-file infracost-base.json
A good way to think about this is to compare what we are doing to Git branches and the git diff command. What we have just generated as our baseline is akin to the main branch, and what we are doing next is to work on a feature branch.
Let’s go ahead and edit the Terraform code to change the instance type on line 33 from t2.small to t2.large.
Once the change is made, we can use the diff command to assess the change to our projected costs:
infracost diff --path . --compare-to infracost-base.json
In our example, this should give us the following output:
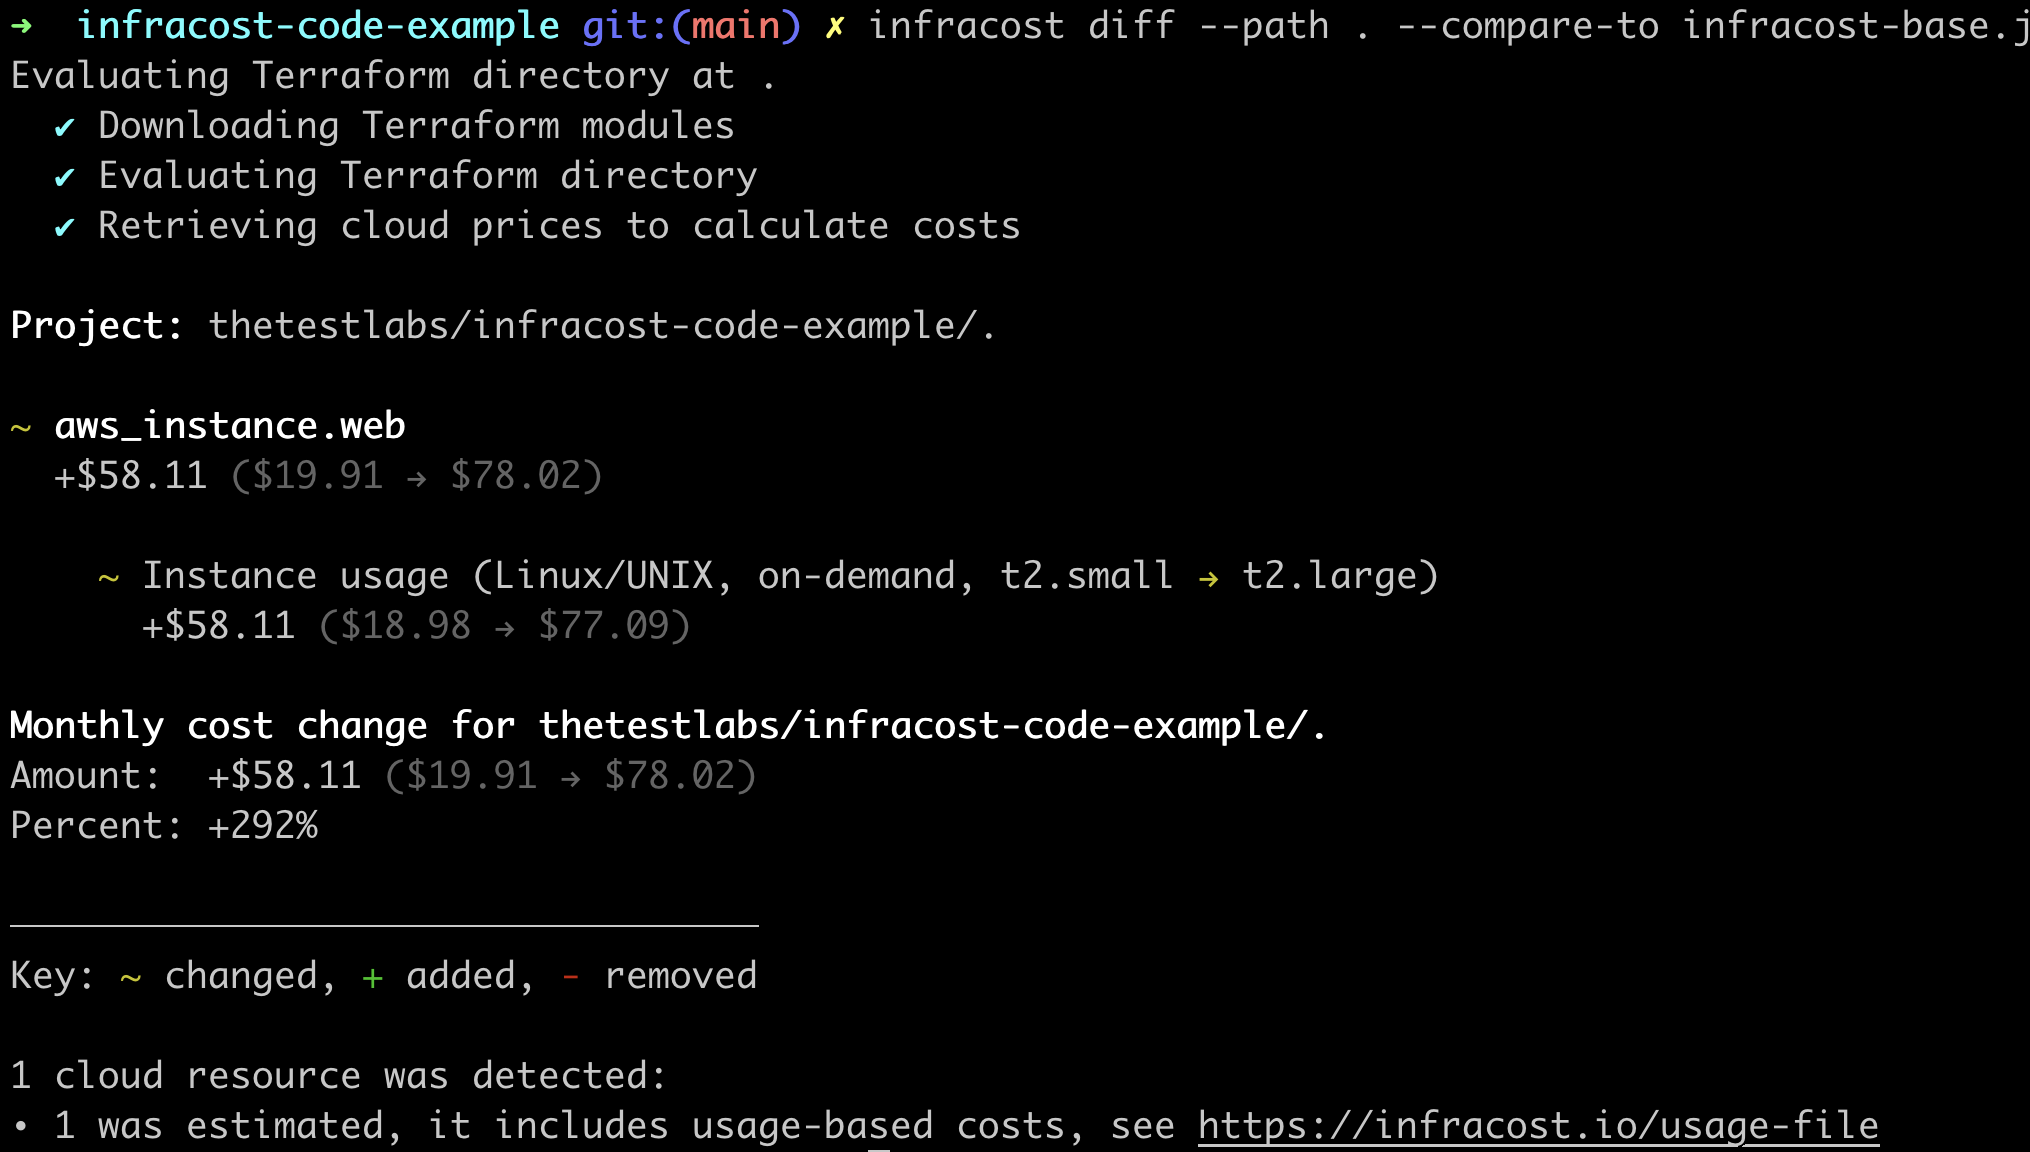
This shows the difference between what you already have deployed, and what you have added (or removed) in your code.
Although a great first step, this would be a lot better if it ran during a pipeline and didn’t rely on the person making changes to remember to run the diff command. Luckily, Infracost have this covered for a number of platforms, including GitHub Actions.
CI/CD with GitHub Actions
In order for the GitHub Action to run correctly, you will first need to add your Infracost API Key as a secret to your GitHub repository. To do this, head over to your forked repo’s Settings and look for Secrets –> Actions on the left hand side. Here you will need to add your API as a secret called INFRACOST_API_KEY.
As a reminder, if you haven’t saved your API Key, you can retrieve it by running infracost configure get api_key.
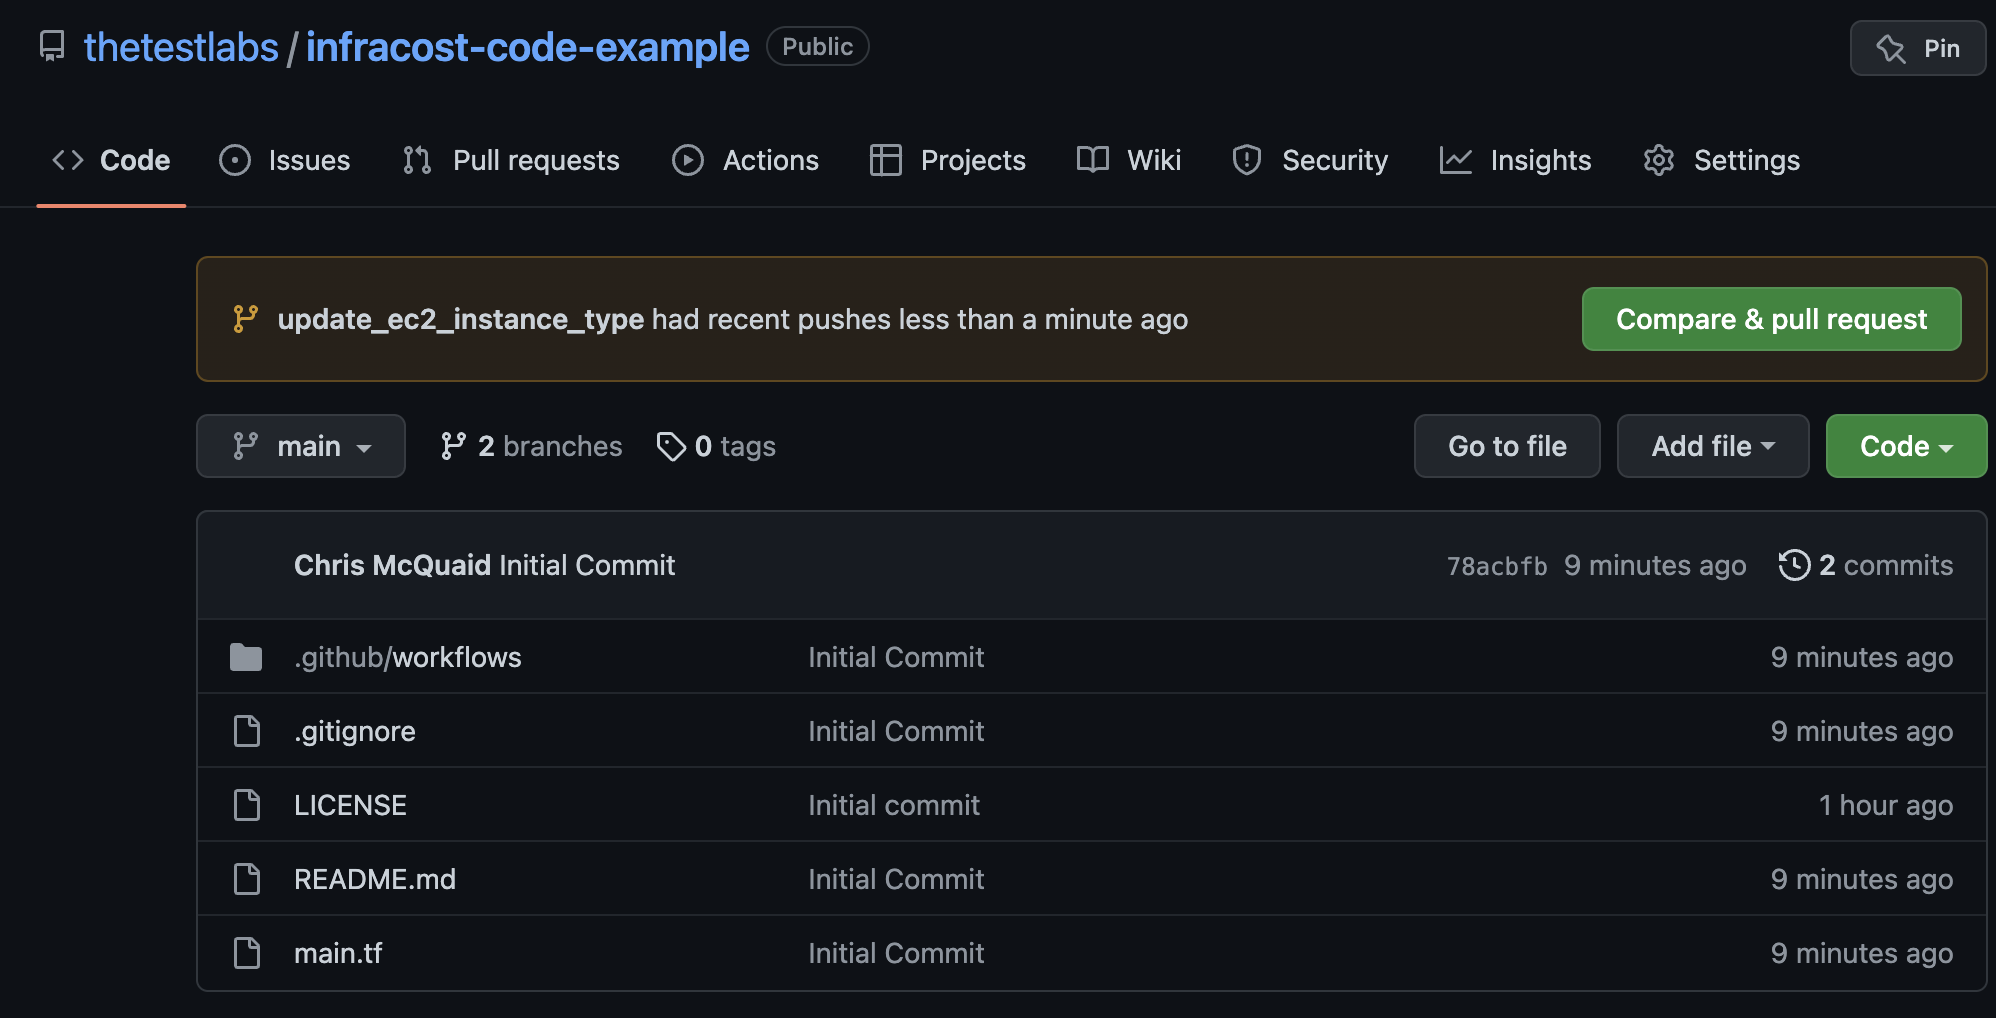
That’s all we need to do in terms of setting things up, so let’s go ahead and create a new branch on our repository by running:
git checkout -b update_ec2_instance_type
This creates a new branch on the repository that contains the change in instance type.
If you take a look at .github/workflows/infracost.yml, you can see that it runs on the Pull Request event, which means that we’ll need to go through that process to see the result. So let’s go ahead and push our local changes:
git add main.tf
git commit -m "Update instance type"
git push -u origin update_ec2_instance_type
If we head over to GitHub, we can now view our newly created branch, and compare the two by creating a PR.
Once the Action has run, it should have added a comment to the PR that looks something likes this:
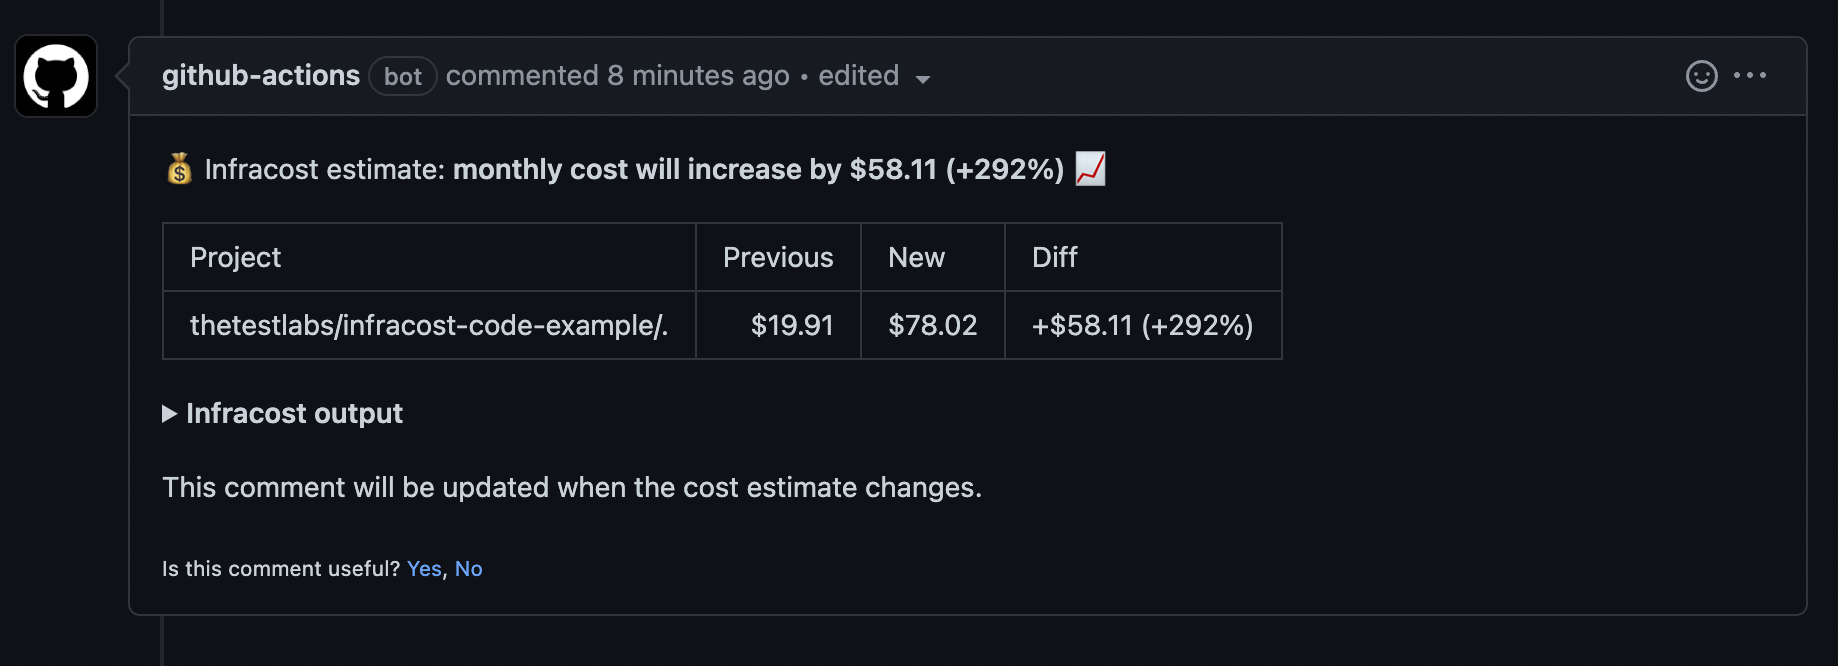
One great feature of this workflow, is that by default if you make further changes, the comment will update itself rather than adding extra comments each time a change is made. This avoids noise in your Pull Request and makes the actual changes to cost easily visible to anyone looking at the PR.
If you’d prefer, you can change this behaviour to any of the following:
delete-and-new - Delete previous comments and create a new one.
hide-and-new - Minimize previous comments and create a new one.
new - Create a new cost estimate comment on every push.
Considering that there are no costs involved in using Infracost, and the simplicity of adding it to existing deploymant pipelines, this seems like a bit of a no-brainer in terms of adding it to both your new and existing projects.